FIELD & FOREST

winter

bittersweet chocolate things

autumn, breads, breakfast, desserts, spring, vegetarian, winterFieldandForest2 Comments

Zomg. You guys. YOU GUYS. Mrrgkjslkjglskfs.

I can't even write real words right now, I am so excited.

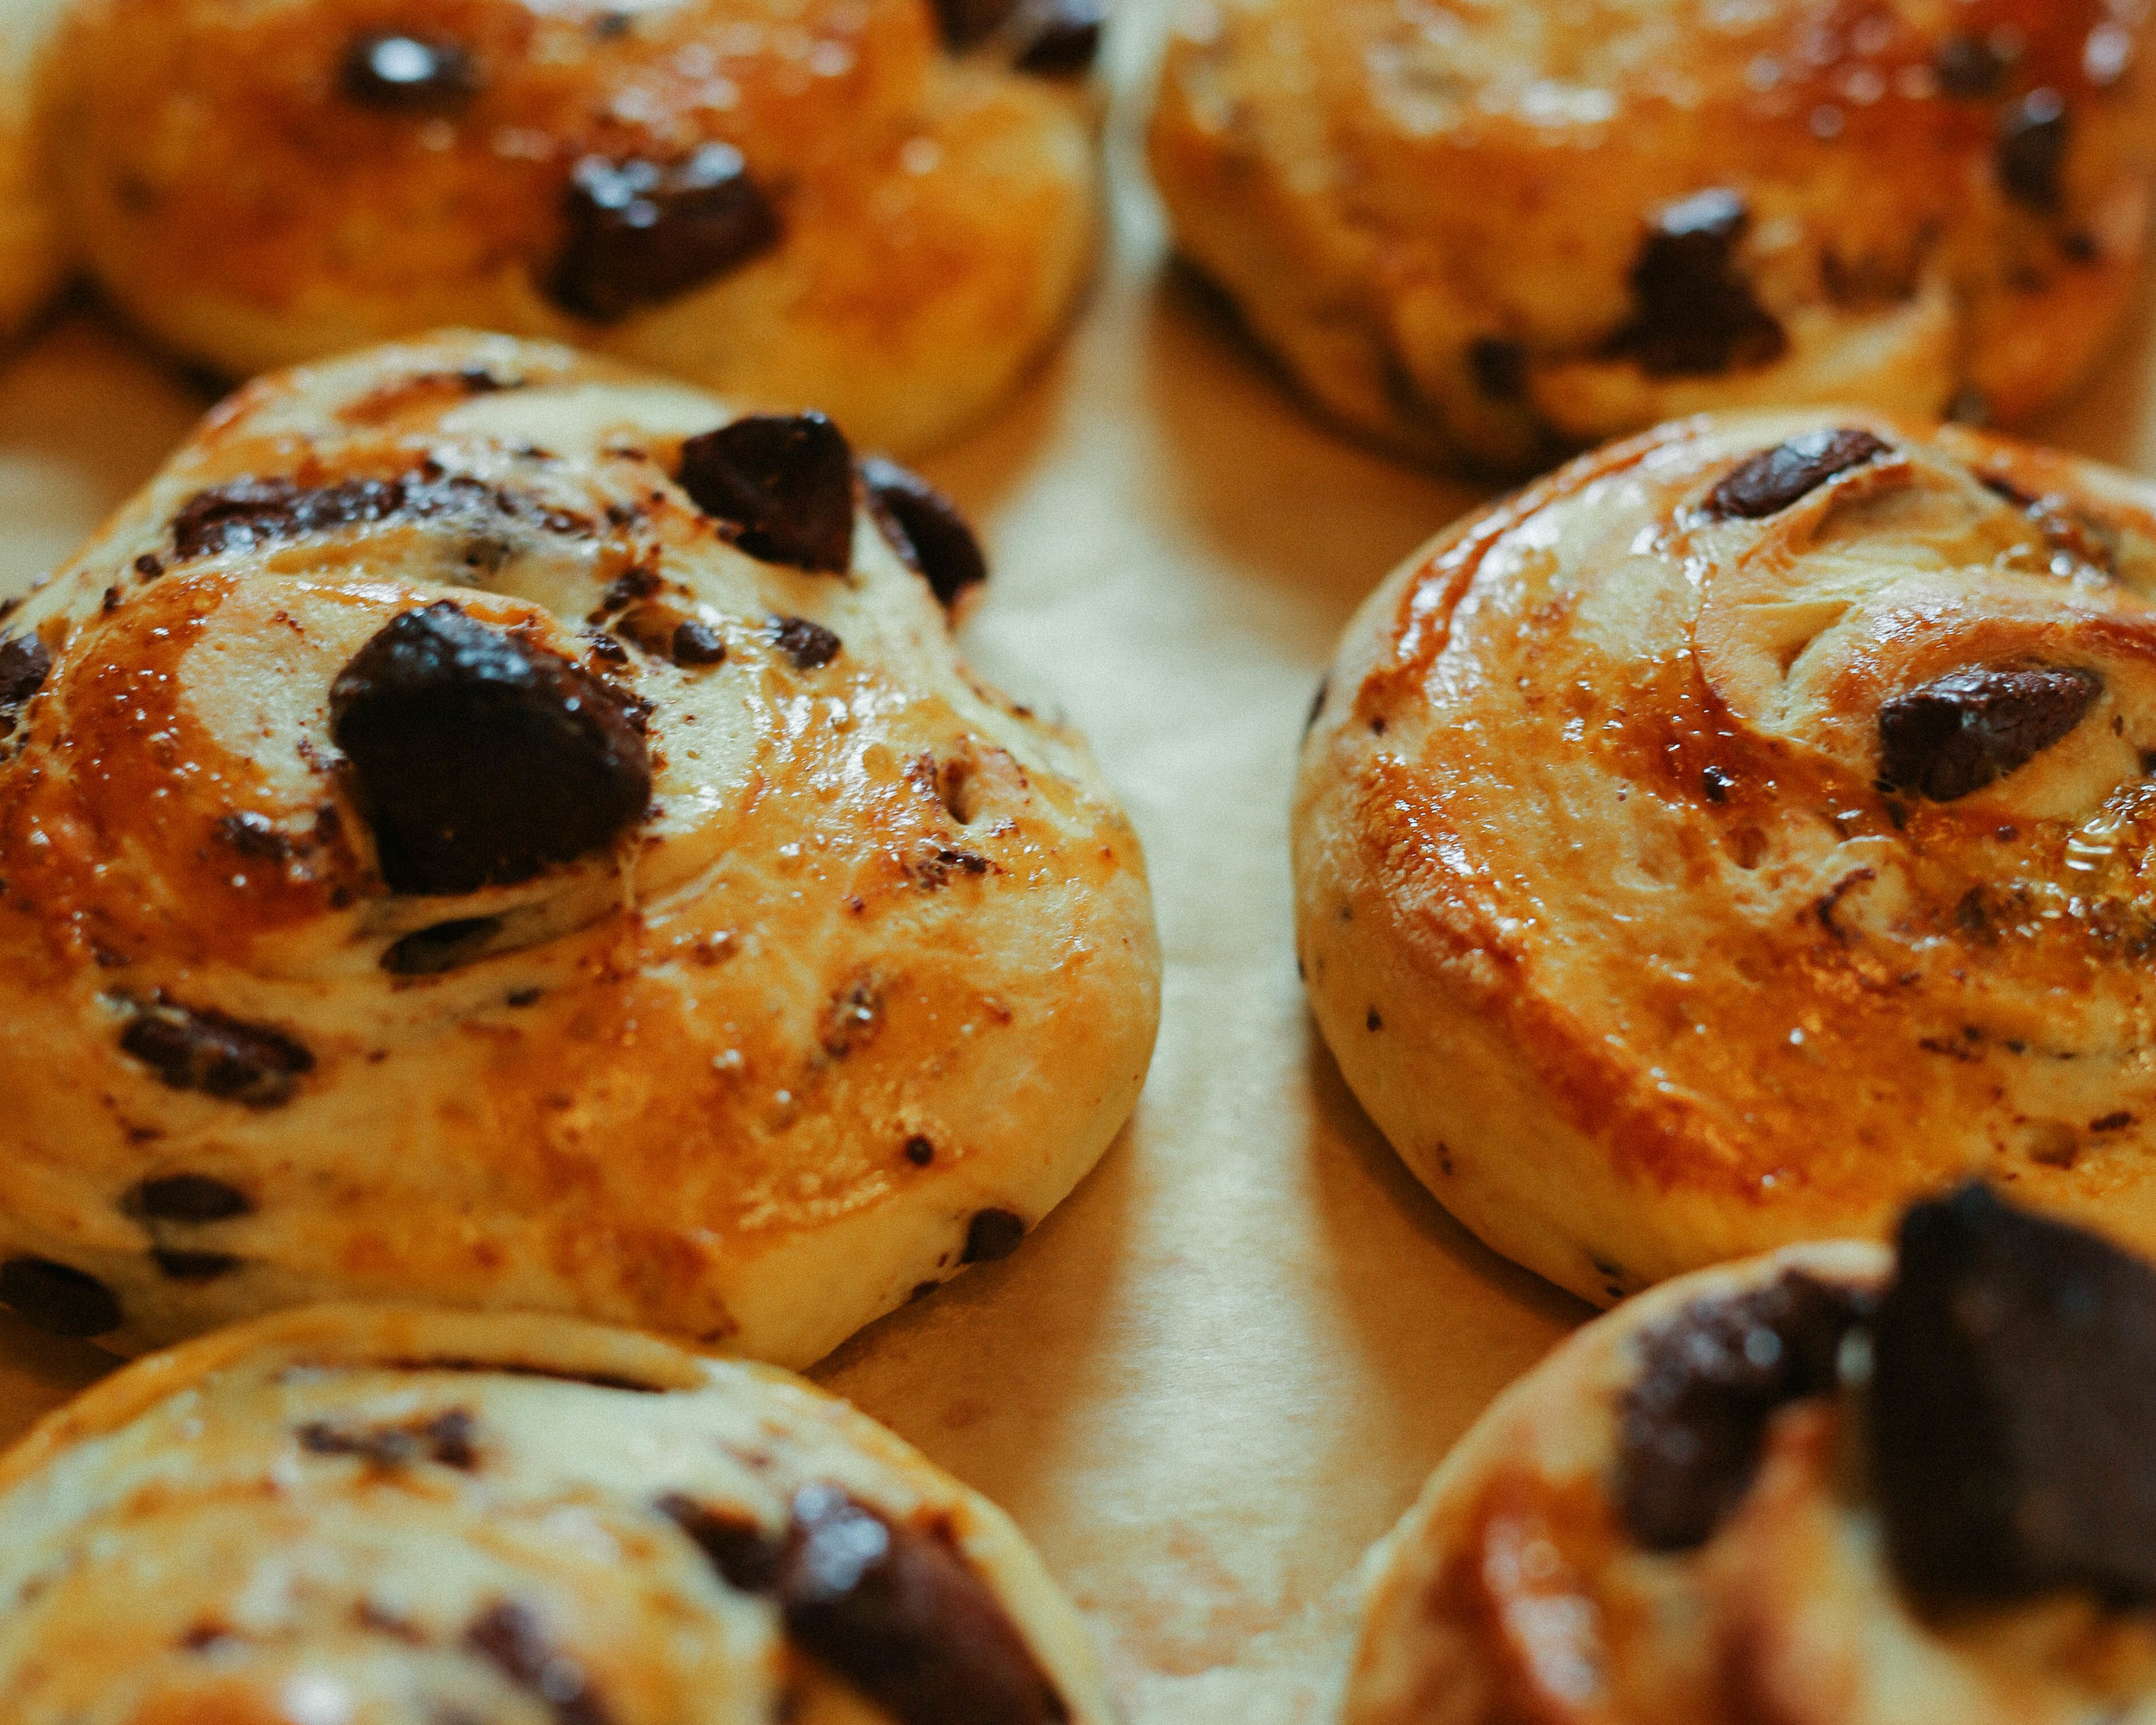
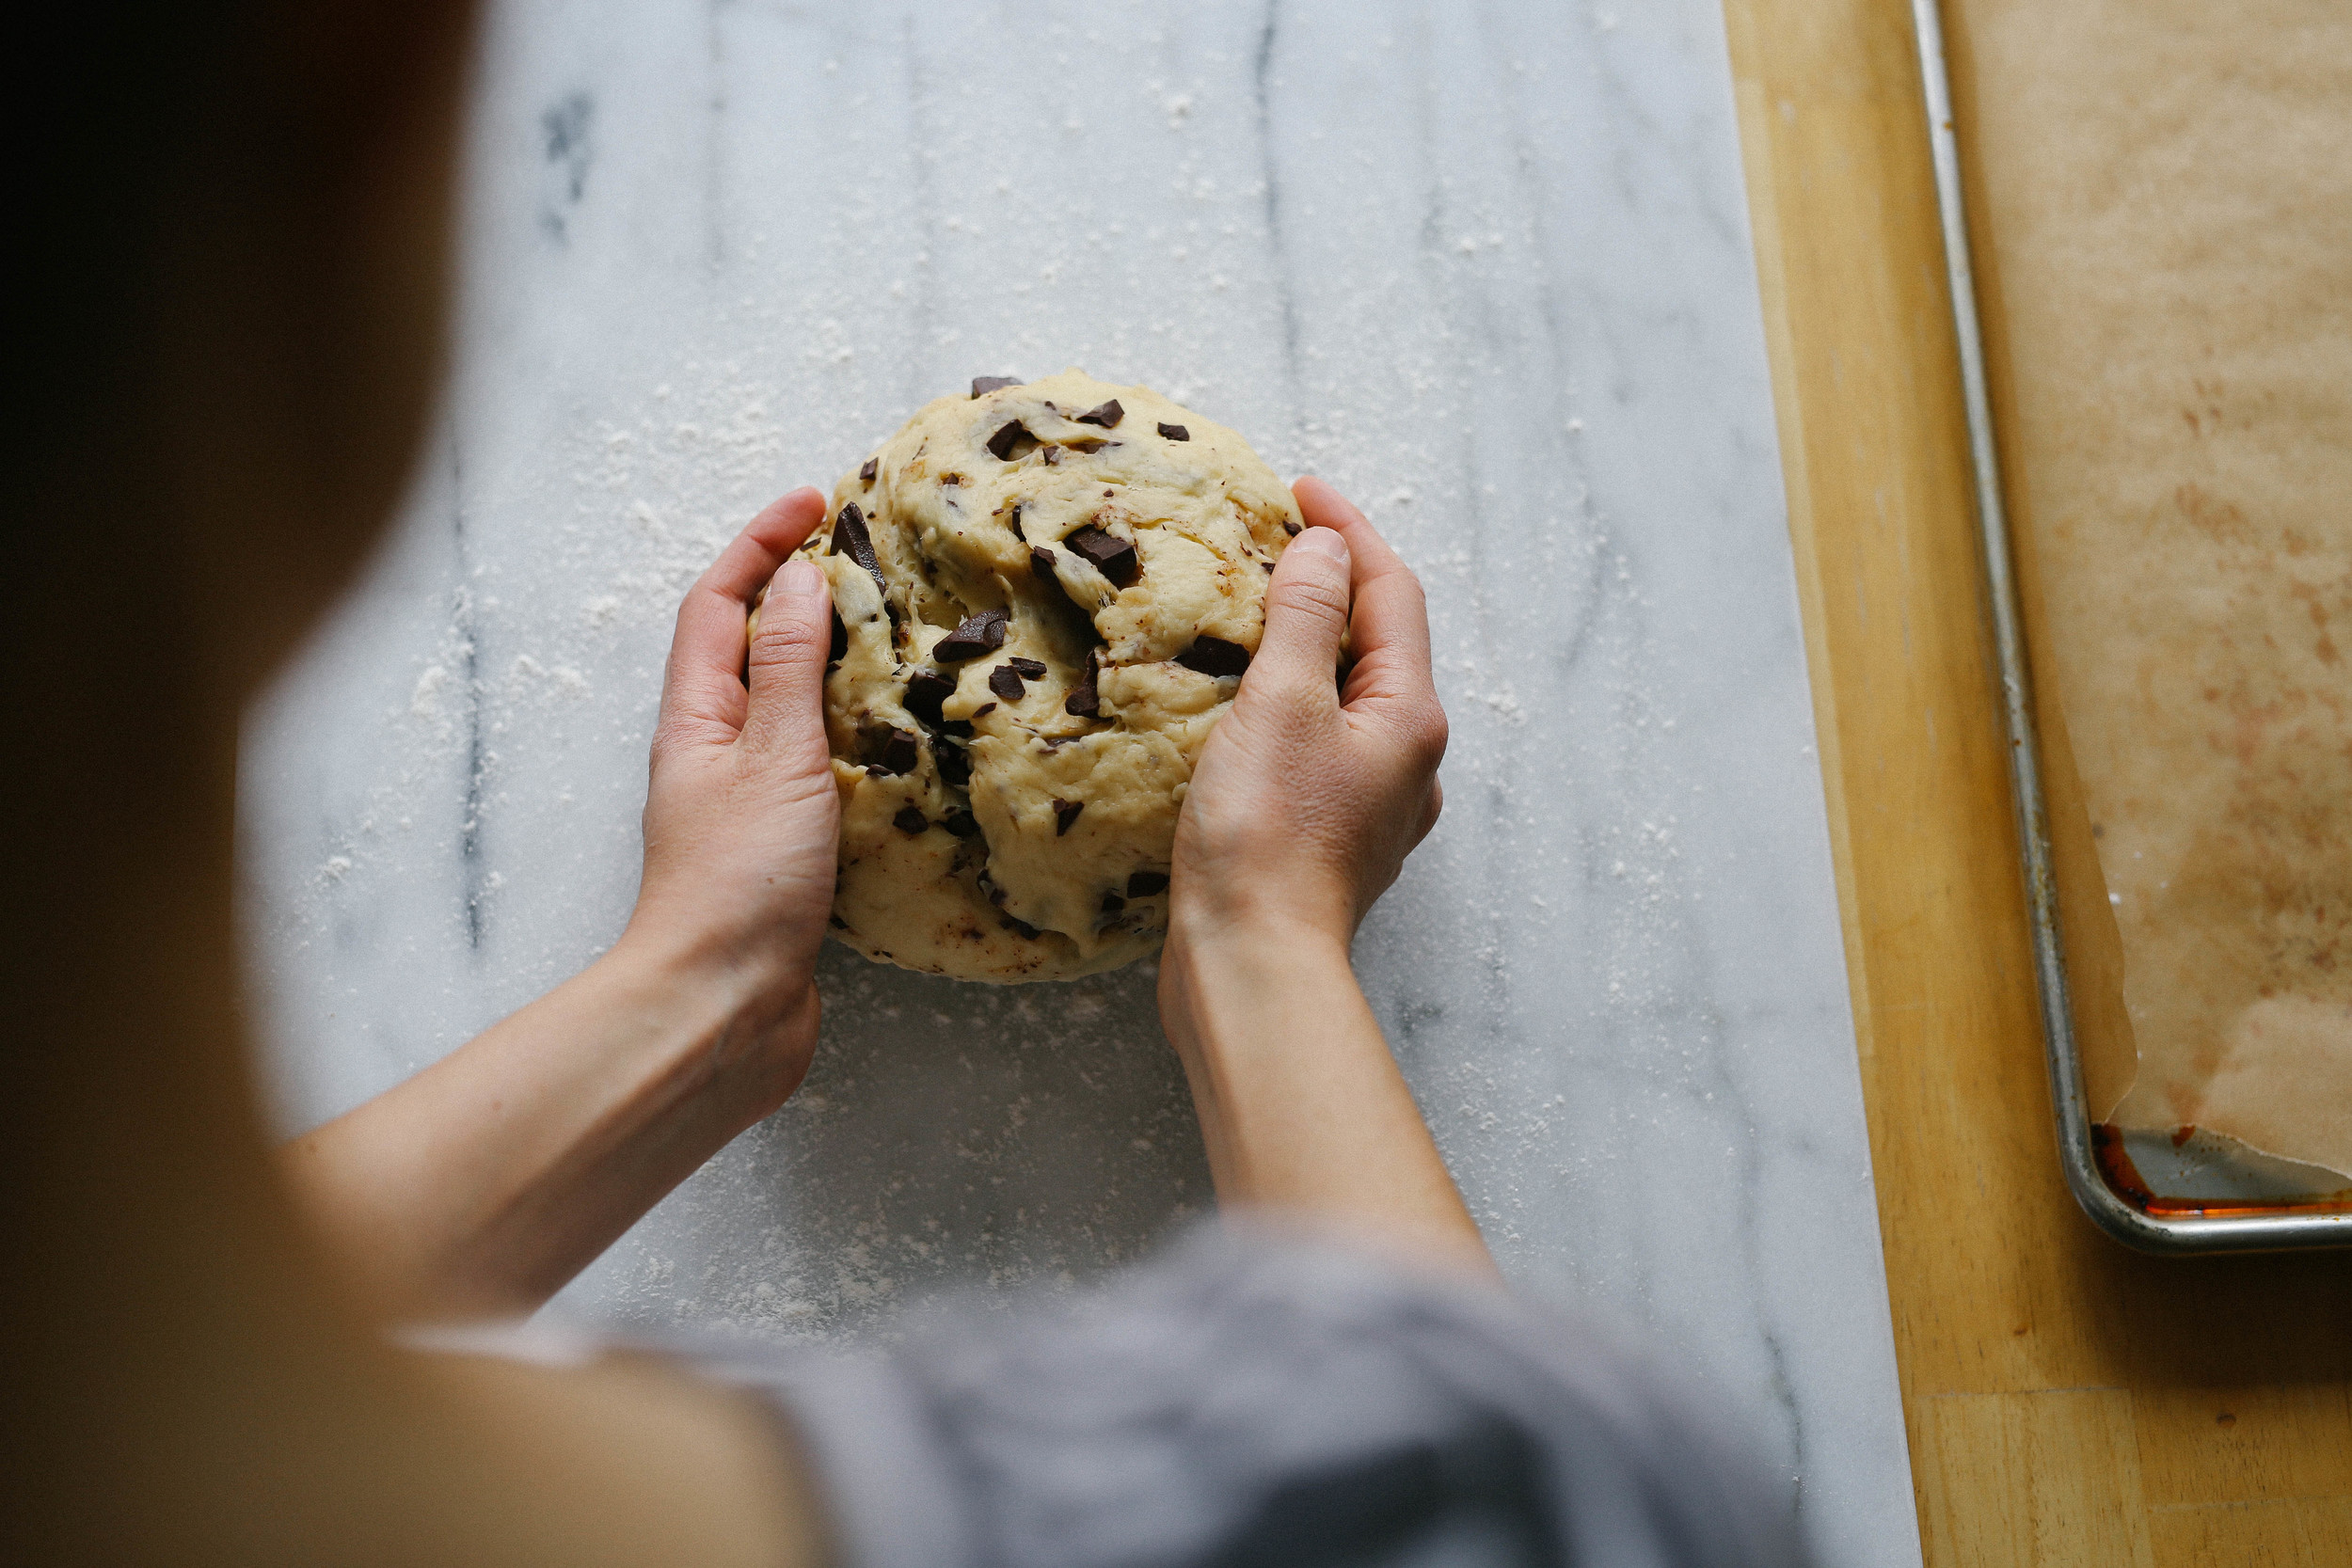
Because Cheese Board Chocolate Things. In Salt Lake City. In our kitchen. That came out of our oven. If you know what the Cheese Board is, then I know you're excited, too. If you don't know what the Cheese Board is, I hope you are at least intrigued by the sheer volume of chocolate folded into this ball of dough. If you know what the Cheese Board is, but you currently live in Berkeley and are thinking "Whatevs, I can get Chocolate Things whenever I want," then shut it. We don't want to hear about it.

(That's a lie, please tell us everything, because goodness knows we're dying over here without our zucchini-corn pizza and oatmeal scones.)

So anyway. What is this Cheese Board thing. Well, it is one of the many magical places in that mystical land known as the Gourmet Ghetto, and it makes amazing breads (and its next-door sister restaurant, Cheese Board Pizza, makes some of the best pizzas in town) and has a crazy cheese selection sourced from all over the planet, and it is one of THE foodie destinations of Berkeley (and it is across the street from Chez Panisse, so you can ogle another institution while you eat your pizza!). Both the pizzeria and the bakery are part of the same collectively owned business (together they are known as the Cheese Board Collective) and they have a pretty unique story of how they've worked to support other collectives/co-ops, and a number of years ago they did everyone a solid and made a cookbook.

And it is glorious.

Everything I've made out of that book is pure gold and tastes almost exactly how I remember Cheese Board pastries and pizza. Sure, I don't have a deck oven or a proofing cabinet, but the essence of every baked good is there. Ownership of this book (and therefore access to all of its secrets) is enough to make a Bay Area expat plant roots in a red state and say "We're good here."

At least for the time being.

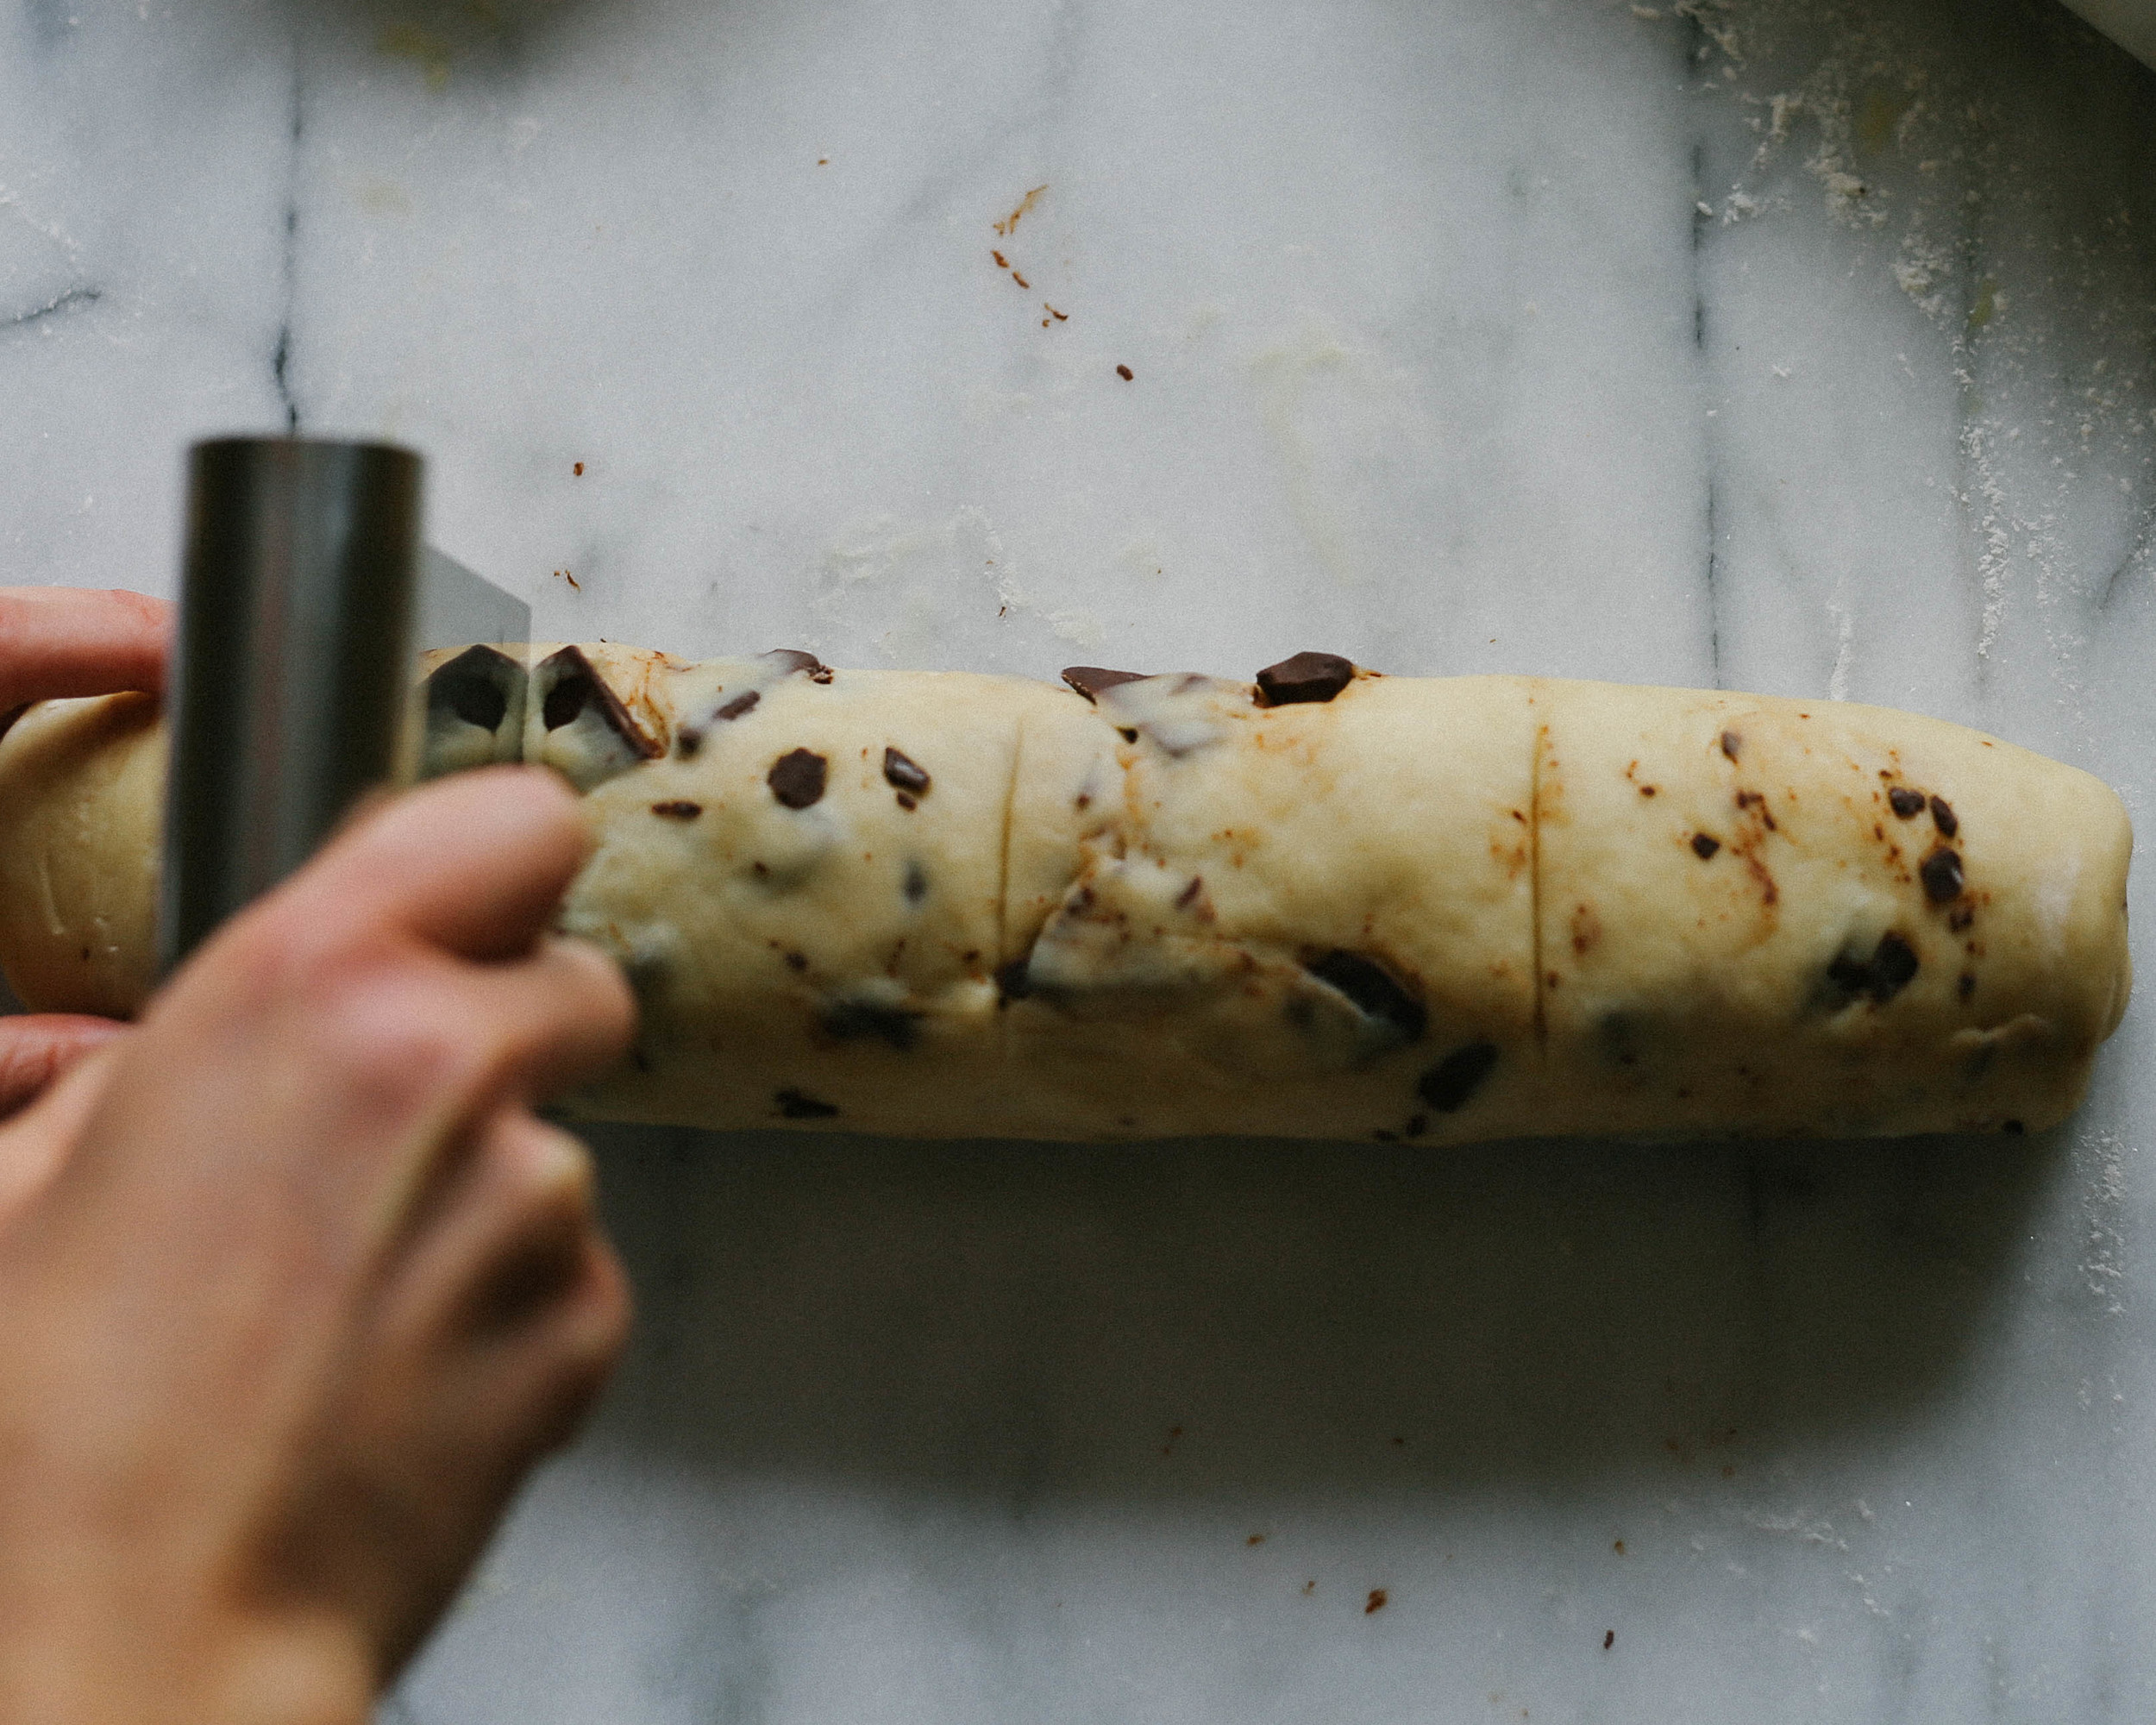
And now a few words from the Voice of Experience to help you achieve your Chocolate Thing dreams! One, do not get super nit-picky about keeping all of the chocolate pieces in the dough when you first mix them in. Some of them will fall out. I'll give you a cheat for working them back in later. Two, use a wire or a floured piece of baker's twine to cut the rolled dough into rounds. This applies equal pressure on all sides of the roll so you end up with neat, photogenic little buns instead of rolls that are all smushed into ovals. Not that there is anything wrong with ovals! We are accepting of all shapes and sizes of rolls over here.

Finally, invite over some friends to help you eat the rolls, because these truly are best eaten warm from the oven while the dough is tender and the chocolate is slightly melty (and this way it saves you from eating all of the rolls yourself in one sitting, though you could probably have worse things happen to you, let's be honest).

Chocolate Things
adapted from the Cheese Board Collective Works cookbook - Makes 12 things

1/2 cup heavy cream
1/2 cup buttermilk
2 1/4 teaspoons active dry yeast
2 1/2 cups unbleached all-purpose flour
6 tablespoons unsalted butter at room temperature
1/3 cup sugar
2 eggs
1 1/2 teaspoon kosher salt
6 ounces dark chocolate, chopped into 1-inch pieces

In a small saucepan, heat the cream and buttermilk over low heat until small bubbles form around the edges of the pan. Pour into a bowl of a stand mixer or a large bowl (if mixing by hand). Let cool until just warm, then whisk in the yeast until dissolved. Let stand for 5 minutes.

If using a stand mixer, add the flour, butter, sugar, 1 of the eggs, and the salt to the bowl. With the paddle attachment on medium speed, mix until the ingredients are combined, about 2 minutes. If the dough is too soupy, add extra flour by the tablespoonful until the dough forms a loose ball around the paddle. Switch to the dough hook and knead on medium speed for 7 minutes, or until the dough is smooth, silky, and elastic. Add the chocolate and knead just long enough to incorporate it (do this step as quickly as possible, as overmixing will result in broken pieces of chocolate and discolored dough).

If making by hand, add the flour, butter, sugar, 1 of the eggs, and the salt to the bowl. Mix with a wooden spoon until combined. If the dough is too soupy, add extra flour by the tablespoonful. Transfer to a lightly floured surface and knead the dough for 10 minutes or until it is smooth, silky, and elastic. Flatten the dough into a 1-inch-thick round and place the chocolate in the center. Gather the dough around the chocolate and knead just long enough to incorporate it.

A quick note: I did a stand mixer/hand mix mash-up where I made the dough with the stand mixer, but kneaded in the chocolate pieces by hand. That seemed easiest to me (and kept chocolate pieces from ricocheting out of my mixer). Just FYI!

Form the dough into a ball and place it in a large oiled bowl. Turn the dough over to cover it with oil. Cover the bowl with plastic wrap or a damp kitchen towel and let rise in a warm, draft-free place for one hour, or until doubled in size. Alternatively, refrigerate the dough to rise slowly overnight. The next morning, remove the dough from the refrigerator and let stand in a warm place for at least an hour before proceeding.

Line a baking sheet with parchment paper or a baking mat. Transfer the dough to a lightly floured surface and roll it out into a 10 by 12-inch rectangle. Don't worry if pieces of chocolate fall out of the dough, just set them aside for the time being. In a small bowl, beat the remaining egg with a whisk. Using a pastry brush (or your fingers, which are easier to clean!) brush a stripe down one of the long edges (and save the leftover egg! You'll use it later!). Take all of the pieces of chocolate that fell out of the dough earlier and scatter them across the dough rectangle. Starting with the non-egg-wash coated edge, roll up the dough lengthwise into a jelly roll shape (rolling up the loose chocolate pieces as you go), using the egg-washed edge to seal the dough roll together. See what we did there? Sneaky, sneaky!

Using a sharp knife, a bench scraper, or a piece of wire or floured baker's twine, cut the roll into twelve 1-inch thick slices and place them on the prepared pan, cut side up, about two inches apart. Cover them with a kitchen towel and let rise in a warm place for 1 hour, or until the rolls are increased in size by one-third.

Fifteen minutes prior to baking, preheat the oven to 350˚F. Using a pastry brush (orrrr your fingerssss), brush the sides and tops of the each roll with the beaten egg. Bake on the middle rack of the oven for 30-35 minutes, or until golden brown. Transfer to a wire rack to cool, or to your face to be eaten.

weekday morning sufganiyot

autumn, breads, breakfast, desserts, snacks, spring, summer, vegetarian, winterFieldandForest7 Comments
4j5a2194.jpg

This post came about weirdly. It began with me wanting to bake something and it ended with me making sufganiyot (also known as Israeli doughnuts, also known as one of the top ten most delicious things on the planet), but somewhere in the middle there I spent 45 minutes standing over the vent in the oven door while it "preheated," flipping through cookbooks in an under-caffeinated haze and wishing that something bread-like and cakey would magically appear in front of me. Every day, lately, has had enough cloudiness and post-holiday malaise to be a potential baking day, albeit one where I am always out of something where 99.9% of the time something = buttermilk.

Note to self: buy buttermilk always. Every time you go to the store. No more of this faking it with milk and lemon juice. Buy buttermilk. BUUUUY IIIIIIIT.

And when you don't buy buttermilk, buy yogurt so you can make sufganiyot.

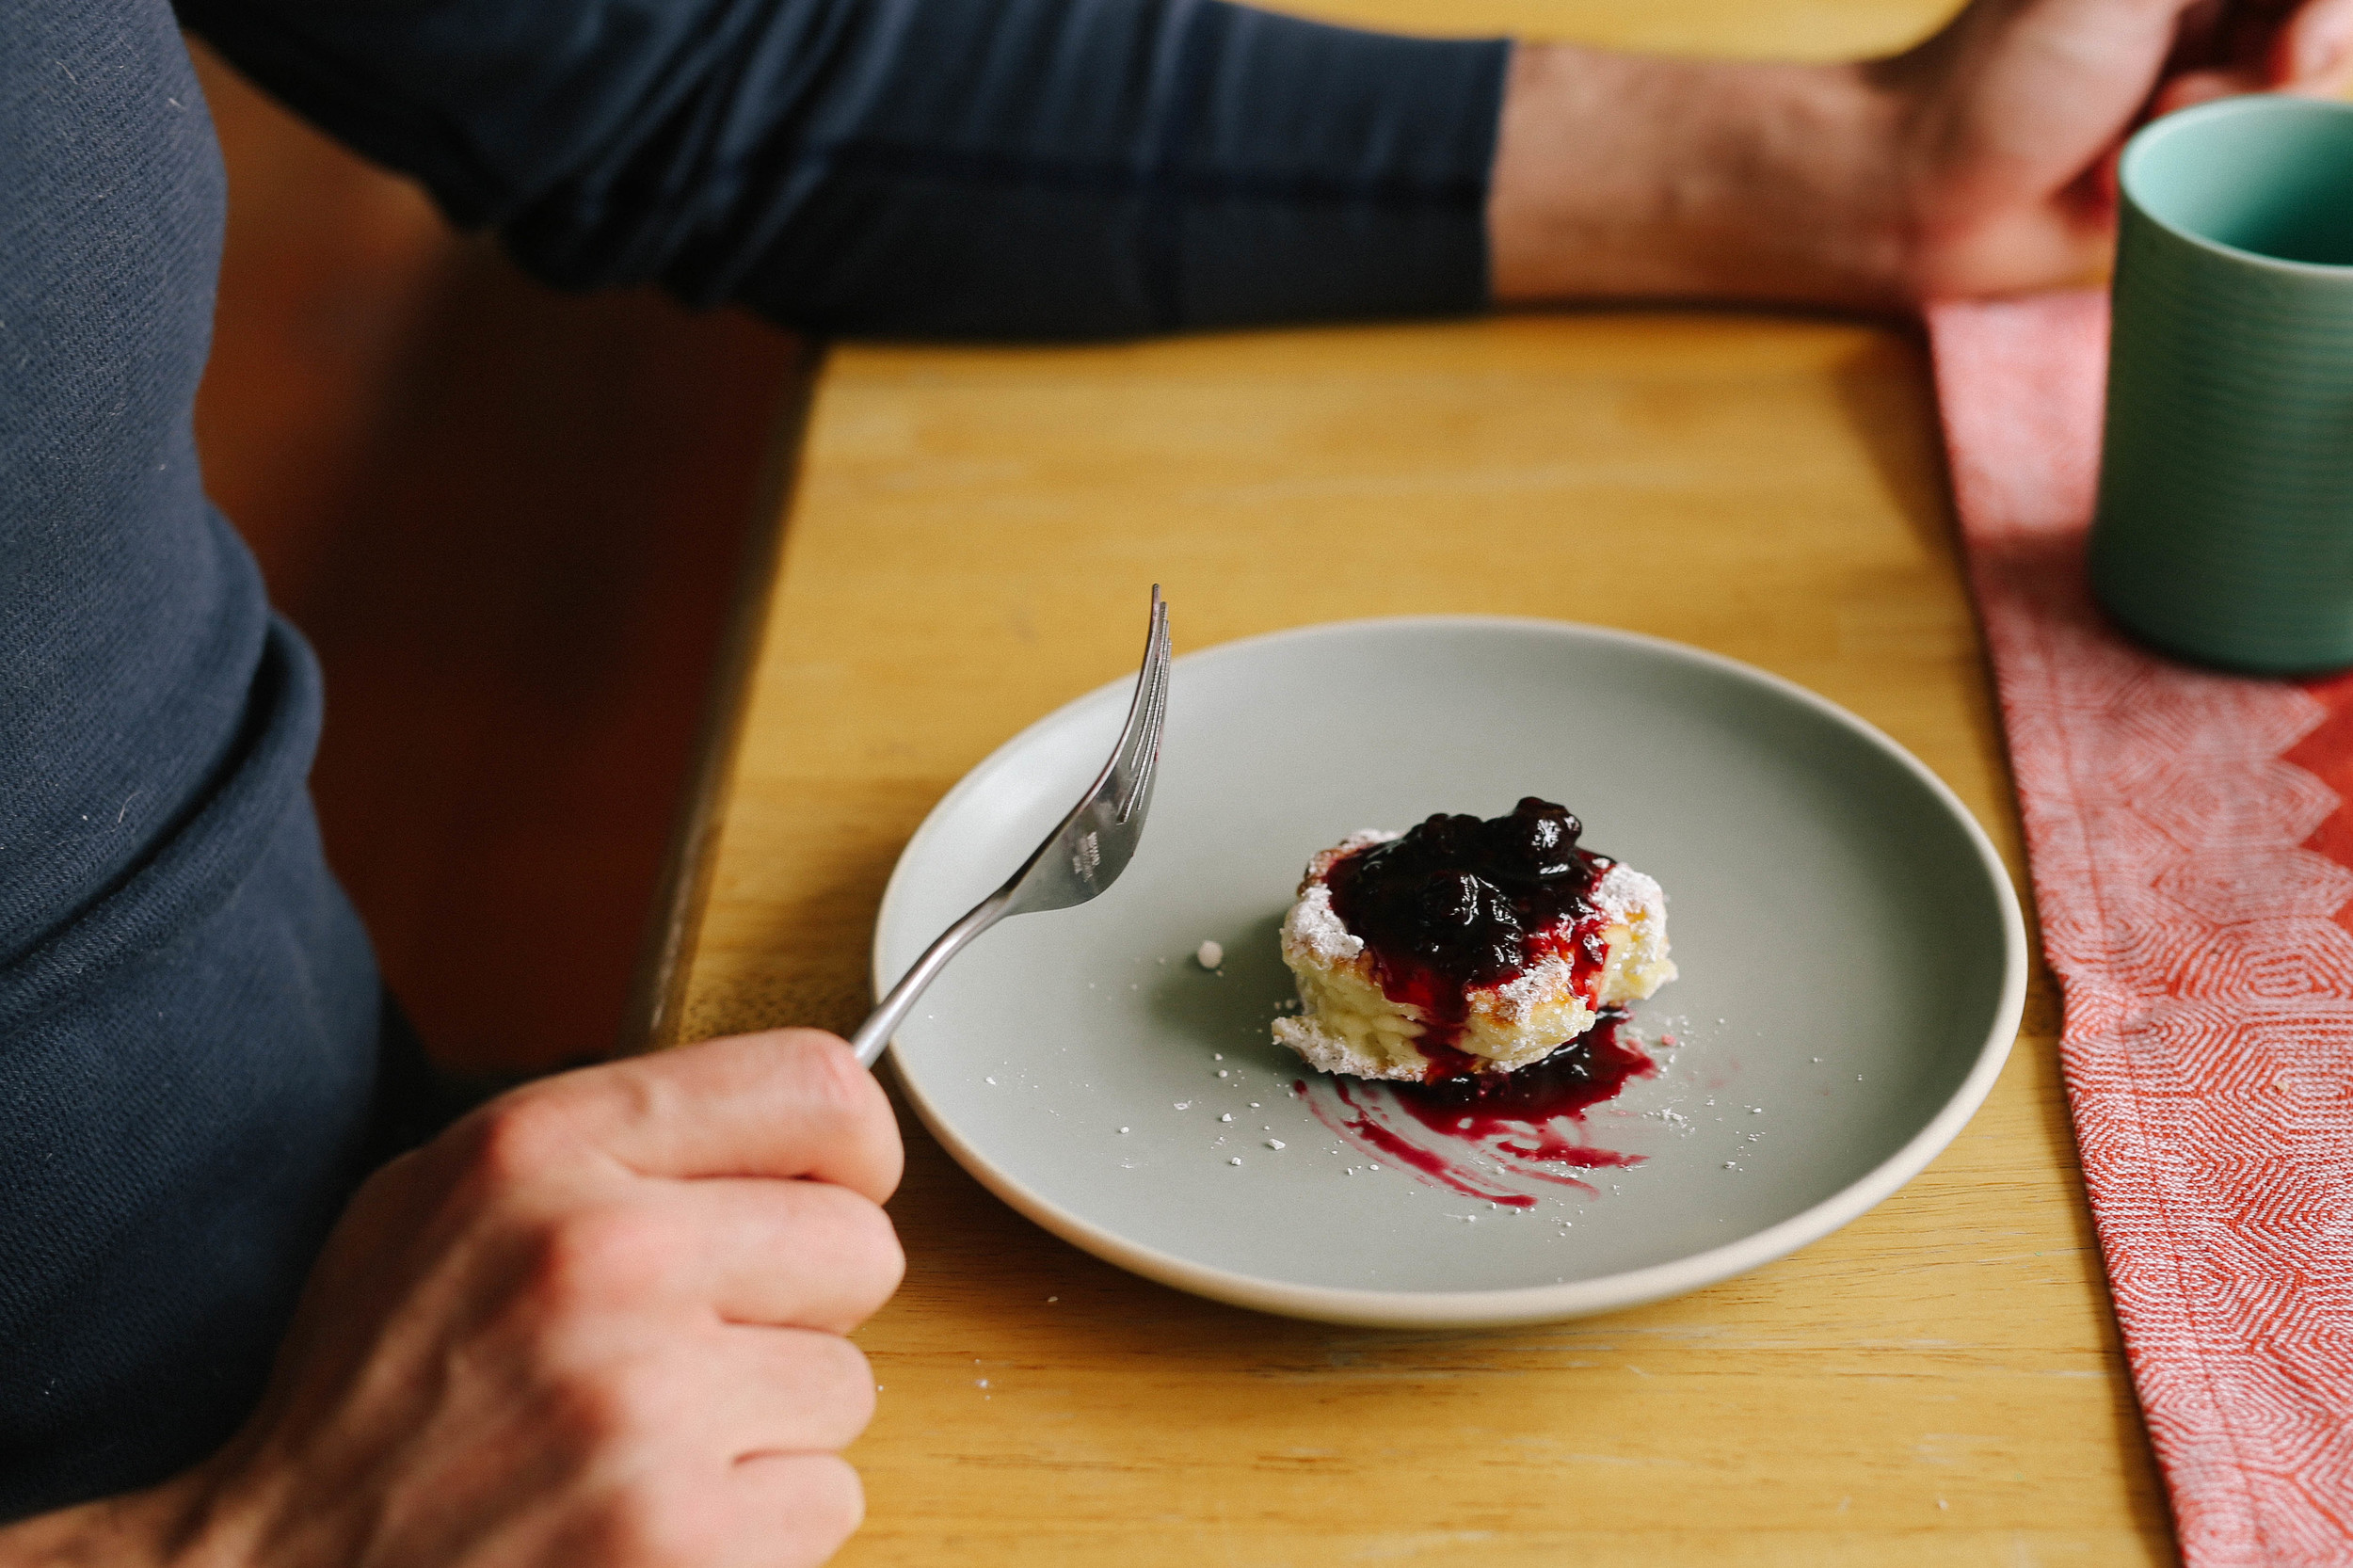
If you haven't made sufganiyot before, there is no time like the present. Seriously. It will take you 5 minutes to make the batter, and a minute or two of panfrying on each side to get you straight to Doughnutland. Or Sufganiyotville. Or wherever you want to go so long as it is crispy and covered in powdered sugar.

Weekday Morning Sufganiyot (Israeli Doughnuts)
recipe courtesy of my mom <3
I would take these little fritters over raised glazed doughnuts any day. If someone tells you they are having a bad day, make them these; they will feel better. If you are having a bad day, make them for yourself; you will feel better. If you or someone else is having a good day, make them anyway! You have to eat breakfast, right?

1 1/2 cups flour
1 t. baking powder
1 T sugar
1 egg
1 cup yogurt
canola oil or ghee

Mix all ingredients together.  Heat oil or ghee in frying pan (enough to completely coat the bottom of the pan).  Once the oil is hot, drop tablespoons of batter into the pan.  Carefully flip when brown.  Briefly (for 5-10 seconds) rest cooked sufganiyot on a paper towel, roll in powdered sugar, and serve immediately with jam.

kale and brussels sprout salad with chickpeas, almonds, and pecorino

autumn, salads, vegetarian, winterFieldandForest2 Comments

If you are what you eat, then I am currently cookies. Every holiday season, I go on a bit of a bender as I try to get my fill of chocolate dreidels and pepperkaker, and this winter was no exception. And while I enjoyed every crumb to the fullest, I am, shall we say, not feeling super-duper amazing as a result. Maybe you are in that boat, or an adjacent one. Perhaps you are currently cake, or pie, or candy. Or perhaps you are smoothies, in which case, maybe you should stop reading this and go get a cookie?

As my New Year's present to you, I give you the dish that I turn to when my body feels meh and I need a pick-me-up. Every time I eat it, I think "This is exactly what I want to be eating right now." No joke. I have even had this for breakfast with eggs and toast. In fact, I would recommend that you try that exact breakfast sometime! I have a hunch that it will make you feel awesome for the rest of the day.

Sidenote: The above photos are of me doing one of my favorite things in the world, which is simultaneous reading cookbooks/writing/eating. Richard just looked at the second picture and said, "I wonder if anyone will comment on how weirdly you hold a pen." I guess we'll find out, won't we?

Kale and Brussels Sprouts Salad with Chickpeas, Almonds, and Pecorino
adapted from Epicurious; serves 2 as a main course, or 4 as a side salad

2-3 small garlic cloves, minced or finely grated with a rasp (microplane)
3 tablespoons fresh lemon (preferably Meyer) juice
1 tablespoon wholegrain mustard
generous pinch (1/2 teaspoon) kosher salt
2-3 tablespoons olive oil (I prefer my dressing on the brighter side, so I usually use 2 tablespoons)
1 bunch lacinato (dino) kale, washed, stems removed, and thinly sliced
1/2 pound brussels sprouts, cleaned of outer leaves and tough bottoms, and thinly shaved or sliced
2 cups cooked chickpeas (approximately 1 can) OR 1 1/2 cups cooked French or Beluga lentils
1/4 cup sliced almonds, fried in a little olive oil until golden brown and sprinkled with a pinch of kosher salt
scant (or, if you're me, generous) 1/2 cup grated Pecorino Romano or other sharp, aged cheese

In the bowl in which you plan to serve the salad, combine the minced or grated garlic, lemon juice, mustard, and salt.  Whisk briefly, and let sit for 5 minutes to mellow the garlic and let the salt dissolve.  Slowly drizzle in the olive oil, whisking continuously. Continue to whisk after the oil is added until the dressing thickens. Set aside.

Add the kale and brussels sprouts to the bowl, and toss to evenly coat with the dressing. Using your hands, give the leaves a few brief squeezes, like you're massaging the shoulders of someone you like.  You'll notice the leaves soften slightly; this is a good thing!

Add the chickpeas or lentils and almonds, and toss to combine.  Add the pecorino, and toss to evenly coat the salad with the cheese.  While this is best served immediately, it keeps extremely well; pack leftovers (if any) in an airtight container and eat for lunch the following day.

new year's eve

winterFieldandForest7 Comments

Hey, all of you out there in internet-land. I just wanted to say a quick thanks before the New Year. This blog is very young, and I am a bit rusty with the word-smithing and all, but I cannot tell you how much it means to me that you swing by here every so often to my corner of the internet and visit (and sometimes even say hello)! Thank you, thank you. This time of year can be nutty and thoughtful, exciting and stressful, overwhelming and overjoyed. I hope that you were (and are) all able to relax and spend time with people you love. I am not big on resolutions in the traditional sense, where we vow to be more "x" or do more "y." I prefer broader hopes and wishes for more of the infinitely meaningful small things. This year, I wish for more laughter, more creativity, more time spent in the present, more meals taken outside. I wish for good health and enough happiness to balance any sadness. I wish for hugs whenever I want them, and I wish that I will be able to care for my friends, my family, and myself as much as is needed/desired. I wish for more sleep, and more dreams. And I wish to connect with you more! Yes, you.

All of these wishes said, if I do have one traditional resolution, it is that in 2015, I will be able to do a handstand. Yesssssss.

Happy New Year, everyone. Much love to you all from Salt Lake City.

parsnip, squash, and apple galette with sage-onion jam

autumn, breakfast, vegetarian, winterFieldandForestComment

I have a friend who doesn't eat leftovers.  Yeah, I don't get it either.  He has a (much appreciated) habit of inviting people over to his house, making a crazy amount of amazing food, and then sending us home with to-go containers at the end of the evening.  Once, as he was shooing us out of his house after handing each person a jar of arroz con pollo, I weakly asked him why he didn't want to keep any food for himself.  He shrugged and said, "I just don't eat leftovers."  This seemed like a non-answer, but I was feeling very possessive of my jar at that point so I didn't press him further.  While I, too, love to cook for others, I've recently come to rely on leftovers as crucial ingredients in weekly dinners.  Roasted vegetables, cooked lentils, and grains from previous meals are often added to our frittatas, pastas, and salads, and when we're feeling fancy, galettes.

"Galette" is a French term for a free-form pie, among other things; it can also refer to an open-faced tart or cake, or an open-faced crepe. The great thing about the pie version is that you don't need any random tools or equipment to make one, and they are just as delicious (in my mind) as standard pies and tarts. If you have a cookie sheet, a card table, and a barbecue, you can knock out an amazing galette.  And you probably have a cookie sheet, a kitchen counter, and an oven, so you are over-prepared!

If you have made pies, tarts, or galettes before and have a habit of making pie crust from scratch, here is where I wish you well and send you down the page to the recipe. However, if you generally purchase pre-made pie crusts, you may not want to hear me say this, buuuuut, I really think you should be making your own pie crust (and I'm so glad you're on the other side of your computer screen so you can't punch me). In the time that it takes you to go to the store and buy a pre-made crust, you could have made your own and have it chilling in the fridge for you. And when you make your own, you can add all kind of yummy things to make it special, as I like to do in this recipe.  But pie dough seems intimidating and time consuming, and I completely understand why.  You probably have specific textural end goals (as you should), and you've likely heard people tell you all kinds of things that you absolutely MUST do to make it perfectly flaky and tender!

And now someone else is going to be upset at this next thing I'm going to say, buuuuut, you don't have to follow all of the normal rules to make delicious and flaky pastry.  Full disclosure: I made this pastry dough by pinching. the. butter. into. the. dough. with. my. fingers.

!!!

With my fingers!  Not a food processor or a pastry blender or two knives but the THINGS that are attached to my HANDS!  Sacrilege.

Should you choose to go this heathenish route yourself, a few things will help you along the way.  One, make sure your butter is straight-out-of-the-fridge cold when you begin working it into the flour. Two, should you feel your butter heating up and getting a little melty (i.e. soft and oily), throw the whole bowl (butter, flour, and all) into the fridge for five minutes to cool down. If you're working in a moderately cool kitchen, you probably won't need to put the bowl in the fridge at all (and if you have poor circulation, as I do, this will be one of those rare moments when you will find your icy-cold hands useful). Three, take a deep breath, and know that everything is going to be okay.  You are making something with butter, flour, and seasoning from scratch, and at worst, it is going to taste pretty freaking delicious.

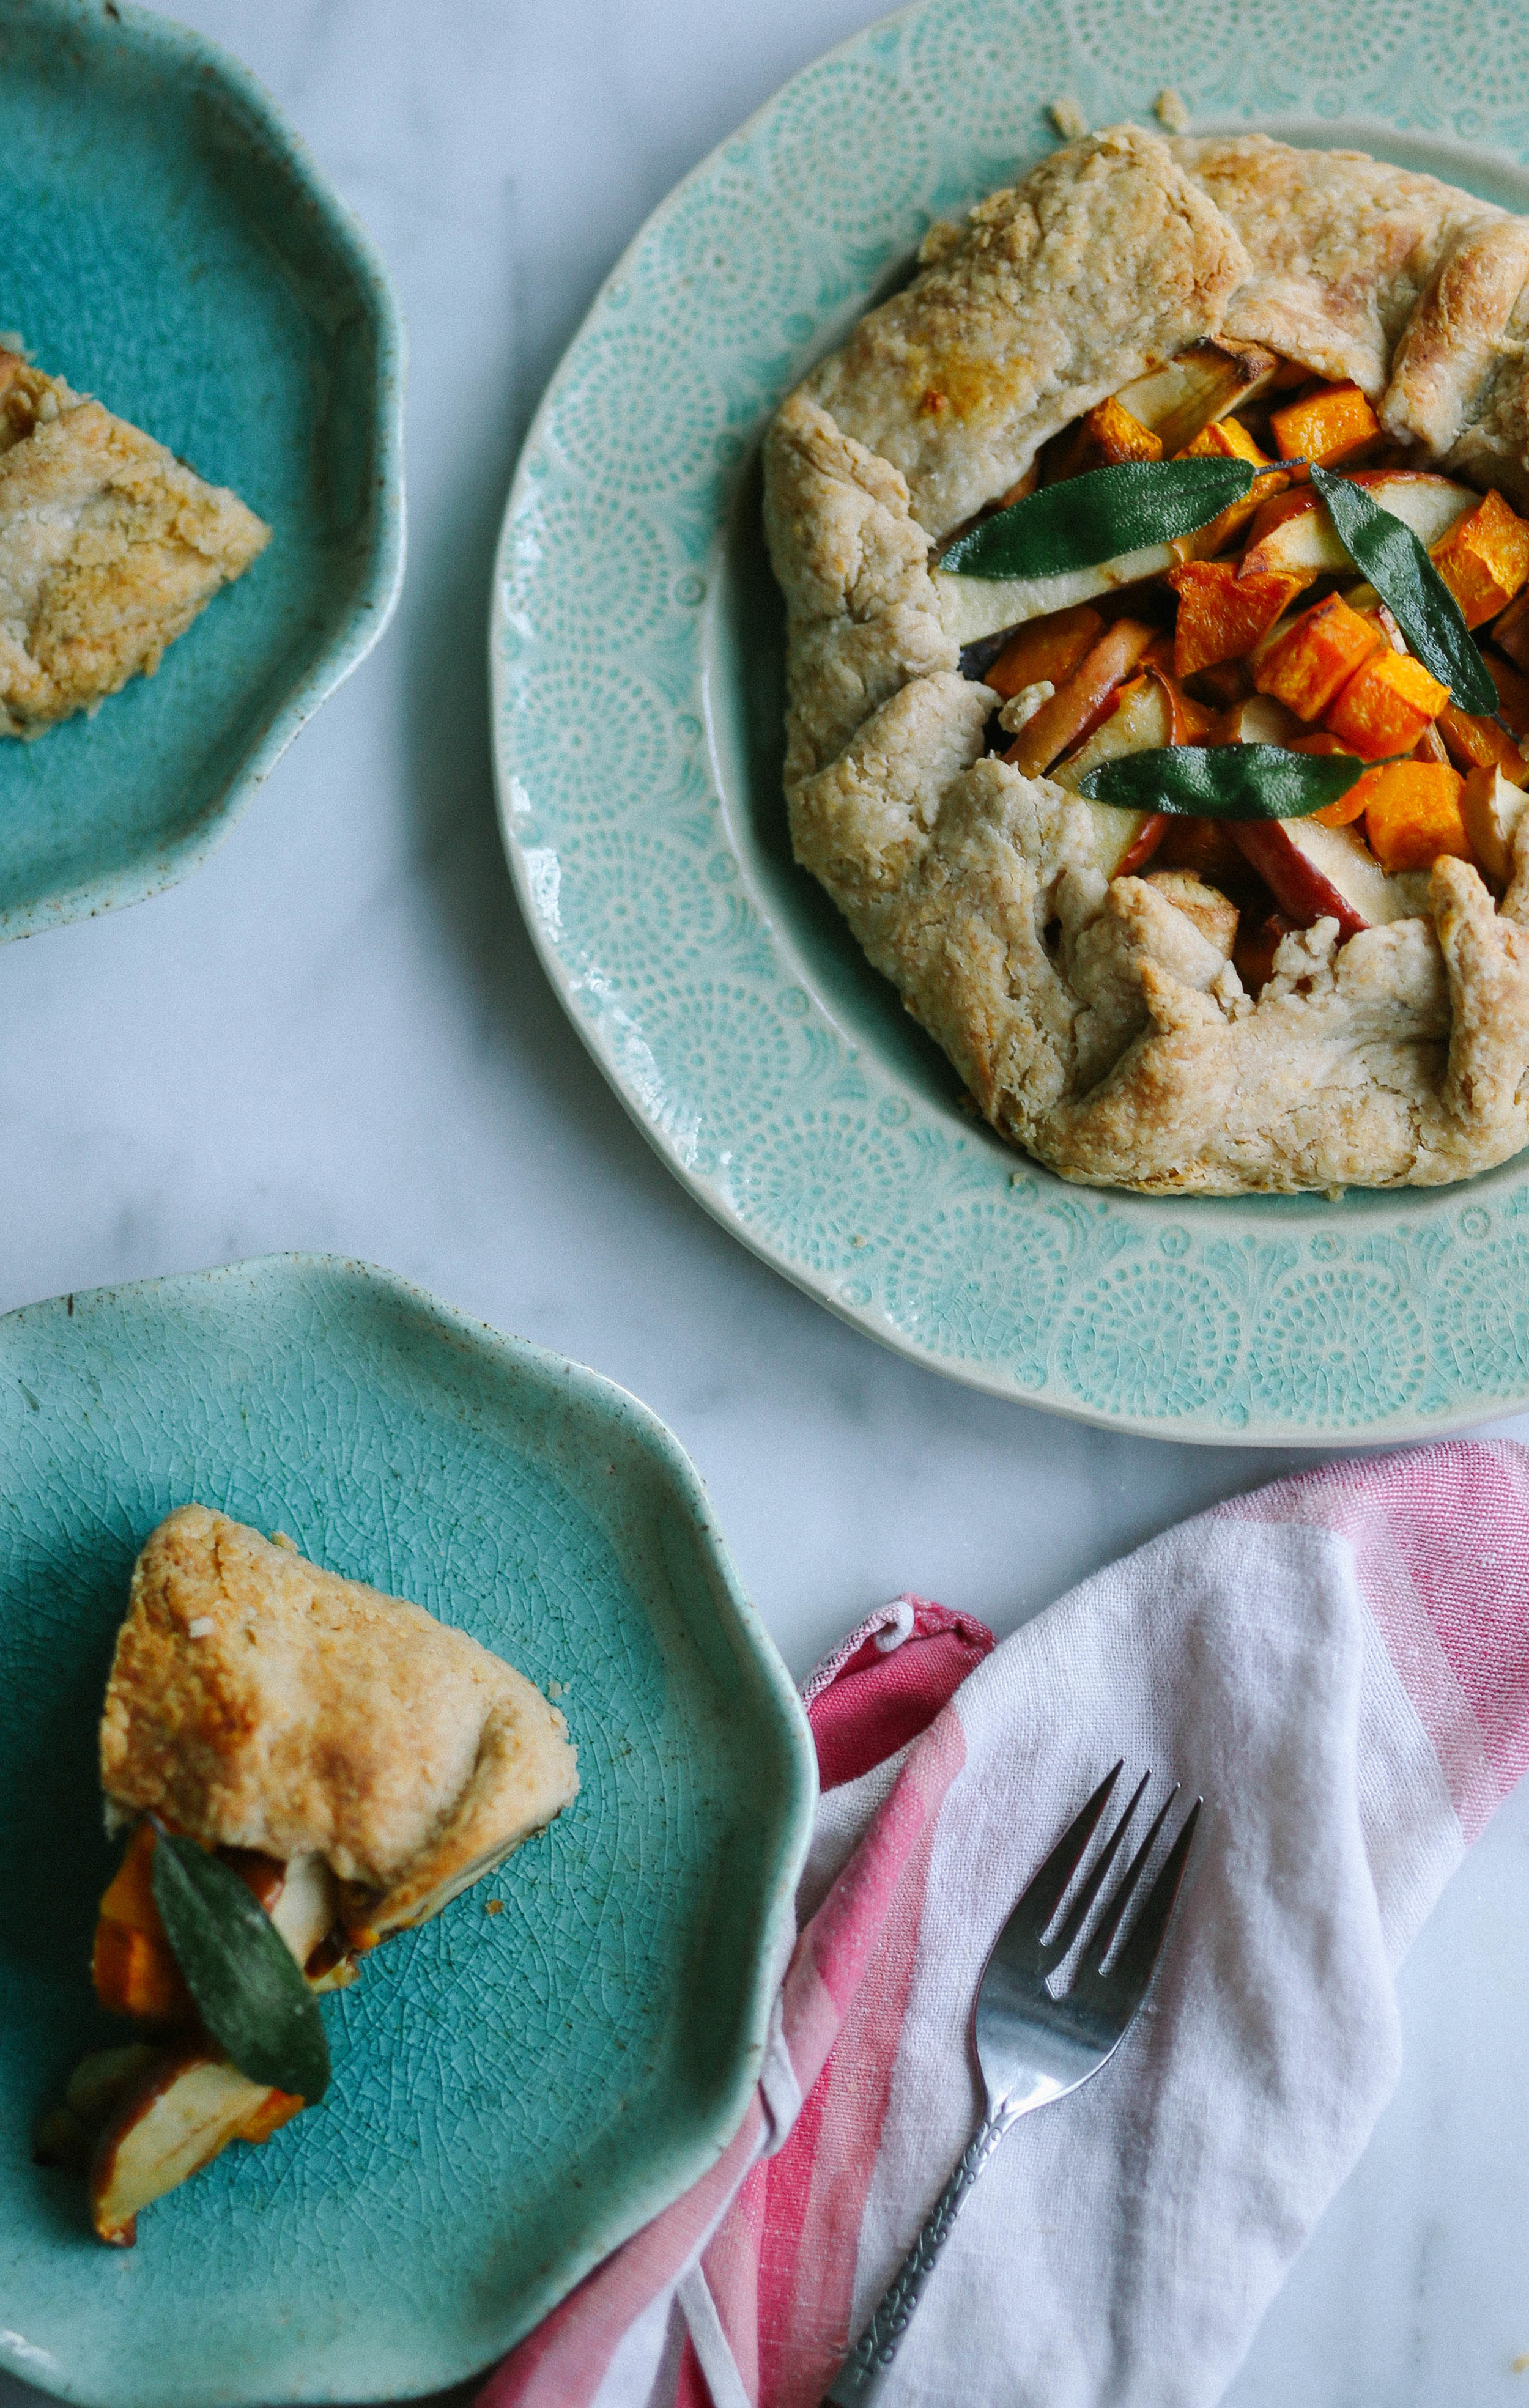
Parsnip, Squash, and Apple Galette with Sage-Onion Jam
There is a lot happening with this recipe, but it is easy to make the components in advance and assemble it just before you're ready to bake; you can easily omit a vegetable and increase another if you aren't a fan of parsnips or squash, though I really like the added sweetness of the apples so I encourage you to keep them in the mix.  If you prefer a juicier galette, use an apple variety that breaks down during cooking, such as Golden Delicious; for a richer tart, dot the filling with goat cheese before you fold up the sides of the pastry.

Pastry (base recipe adapted from Thomas Keller; additions inspired by traditional flavorings for gougeres) - makes enough for two galettes, two tarts, or one double-crust pie
2 cups all purpose flour
1/2 cup wheat flour
1 teaspoon kosher salt
1/2 teaspoon freshly grated nutmeg
1/2 teaspoon dry mustard
a few good grinds of black pepper
1/2 cup freshly grated hard cheese, such as Pecorino-Romano (which is what I used) or parmesan 2 1/2 sticks cold butter
5 tablespoons ice water (or possibly more)

Sage-Onion Jam
2 tablespoons butter + 1 teaspoon butter, divided
2 medium yellow onions, thinly sliced from top to tail
Kosher salt
2 teaspoons dark brown sugar
A splash of apple cider vinegar
2 tablespoons freshly chopped sage

Filling
3-4 cups roasted vegetables (such as parsnips, carrots, butternut squash, sweet potatoes, or a mixture; I used parsnips and squash, though I might omit the parsnips next time as their flavor is a bit strong)
1 apple (I used a Fuji, because it was what I had on hand, but use whatever you would like; baking apples, such as Granny Smith, will get softer than Fuji)
2 tablespoons butter, divided
juice of one lemon, divided
fried sage leaves for garnish (make by heating a little butter in a pan and frying the sage leaves until crisp but still green)

Make the pastry: combine the all-purpose flour, wheat flour, kosher salt, nutmeg, dry mustard, black pepper, and grated cheese in a bowl, and whisk to combine.  Cut the butter into 1/2-inch pieces and drop into the bowl with the flour (alternatively, you may combine the flour and butter in a food processor).  Cut the butter into the flour using a pastry cutter, or pinch the butter into the flour with your fingers, breaking up the butter into smaller pieces as you go (or pulse your food processor a few times to break up the butter into smaller pieces).  You should end up with pea-sized (or smaller) nuggets/little smears of butter throughout the flour.

Drizzle the ice water over the butter-flour mixture, and mix (or pulse) to combine.  The dough should be crumbly, but should stick together when pinched with your fingers (if it does not stick together, add a little more water, a tablespoon at a time).  Press the dough into itself a couple of times while still in the bowl, just until you're sure it is mostly coming together.  Turn the dough out onto a work surface, and divide it into two equal (albeit, crumbly) pieces.  Press each piece into a flat disk, and wrap both tightly in plastic wrap.  Set in the fridge to chill for at least one hour, or up to three days (the dough will be eatable after this point, but the flour may oxidize and become grayish).

Make the sage-onion jam: melt the butter in a heavy-bottomed pan set over medium-low heat.  Add the onions, and stir to coat evenly with the melted butter.  Add a pinch of salt to let the onions sweat; you want them soften at this point, but not brown.  Listen to the onions as they sweat, and if you notice that the sound seems loud, it is likely that your pan is too hot and the onions are beginning to crisp.  Stir occasionally so that the onions cook evenly.

Once the onions have softened, add the dark brown sugar and turn up the heat to medium.  Let the onions cook, stirring occasionally, so that the sugars caramelize and the onions begin to brown.  They will move from pale beige, to golden brown, to a light caramel.  Once they reach this light caramel stage, turn up the heat a notch, add the vinegar, and stir to scrape up any onion bits stuck to the pan.  Continue cooking the onions until they reach a deep caramel color.

Scoot the onions to one side of the pan, and melt the teaspoon of butter in the empty space in the pan.  Add the sage to the melted butter, keeping it separate from the onions while it cooks.  Once it has crisped and the color has changed to a dark, muted green (this will take about a minute), mix the sage into the onion mixture.  Cook for a minute or two more, stirring frequently, then remove from the pan and let cool.  Scrape the mixture out onto a cutting board, and run your knife through it a couple of times (this will make the mixture less stringy and more jammy).  Taste and add additional salt if needed.  Set aside, or refrigerate in a covered container for up to 1 week.

To fill and shape the tarts: preheat the oven to 375 degrees F, and line a baking sheet with parchment paper. Remove the pastry disks from the fridge, and let sit, still wrapped, at room temperature for 10-20 minutes.  Unwrap one disk, and place it on a lightly floured work surface. Roll the pastry into a 1/8" thick circle, and transfer to one side of the parchment lined baking sheet.

Slice the apple into pieces, and set aside.  Spread half of the sage-onion jam in the middle of the pastry round, leaving a 2-inch border of bare pastry.  Mound half of the roasted vegetables on the jam, and tuck half of the apple slices among the vegetables.  Fold the pastry up and over the vegetables, overlapping the folds so that there are no places where the filling can escape.  Once the pastry is all folded, press around the tart gently to seal the pastry folds.  Gently scoot the galette to one side of the pan to make sure there is enough room for the second galette.  Repeat with the second pastry disk and remaining vegetables and jam.

Once both galettes are filled, cut one tablespoon of butter into pieces and scatter over the top of both tarts.  Sprinkle the exposed vegetables and apples with the lemon juice.  Bake at 375-degrees for 15 minutes, then lower the heat to 350 and bake for another 10-20 minutes, or until the pastry is fully cooked and golden brown.  Top with the fried sage leaves, and serve warm or at room temperature with a green salad.  You may also refrigerate the tart for up to two days;let it come to room temperature, or rewarm it in a 300-degree oven for 10-15 minutes before serving.